Facebook Pinterest Instagram Bloglovin' Teachers Pay Teachers Image Map
Showing posts with label Organization Tips. Show all posts

The Evolution of Homework Collection - A New Routine To Keep It Simple


Teaching is a wonderful world of constant change. Although some of the changes we make in our classrooms are mandated, many are based on our own professional judgement. We are given the creative power to tweak our classroom environment and routines in ways that make each school day meaningful and exciting for students. One of the best things about being a teacher is making small tweaks within a year or throughout several years to maximize efficiency in the classroom. 

Tweaking Your Homework Collection Routine


One of the classroom routines I have been tweaking every year for seven years is my routine for collecting homework. Those first few minutes when students walk into the classroom are filled with a lot of hustle and bustle...and an occasional unexpected surprise. Homework collection should be quick and seamless. A few routines I have tried with short-term success are:


TURN IN BIN

Students place their homework in a turn in bin. The pros? Homework submission was quick for students. The cons? I often found nameless papers and it took too much time to sort through the pile to figure out who had & hadn’t turned in homework.


CORNER OF THE DESK

Students place their homework on the corner of their desk before starting their morning work. Teacher walks around and collects homework from each student. The pros? I was able to greet each student at their seat first thing in the morning. It was easy to see who had & hadn’t turned in homework. The cons? The collection process was time consuming and homework crowded students’ work space.

STACK ON THE STATION 

Students place their homework in a pile at a central location on or near their table group. Teacher walks to each group’s “turn in spot”, thumbs through papers and collects. The pros? I was able to collect homework fairly quickly. The cons? My less organized students who benefit from visual cues (they didn’t take note of the flat stack of papers piled near their seat) consistently needed reminders to turn in homework.

My Favorite Homework Collection Routine


The routine that has been most efficient for my students is very similar to the group station routine with an added layer of organization. The Homework Drop Box makes turning in assignments quick and easy for students and teachers. 


HOW IT WORKS

At the end of each day during Tidy Up Time, our Teacher’s Assistant places a drop box at each table group. 


When students arrive the following morning, they walk to their group drop box, find the file folder with their name on it, and drop their homework inside the folder. Students place their assignments in their folder standing tall in portrait-style rather than laying down in landscape-style. This allows the teacher to quickly walk to each station, thumb through each folder and instantly see who has and hasn’t turned in homework. 


The teacher can then grab the top of all the papers at once and pull the assignments out into a neatly organized pile. 


In my classroom, the Teacher’s Assistant then moves our drop boxes out of the way until we need them later in the day, or until the next school day. 


Having a smaller file box at each group, rather than a larger one for the entire class eliminates the problem of a long line to turn in homework. This means students settle into their seats and start their morning work without wasted time.

Although some of the changes we face as teachers tend to throw off our equilibrium for a moment, focusing on smaller changes that benefit our students helps bring us back to a more balanced and efficient groove in the classroom. 

BRING THIS ROUTINE TO YOUR CLASSROOM

If you are interested in trying the Homework Drop Box routine in your own classroom, grab my free Homework Drop Box Labels here and my favorite study, slim file bins here.


Teacher Time Savers (with The Friendly Teacher)


In the past I have used files, binders, and even tried only using my computer to organize my things. That is when I found this idea from one of my good friends, First Grade Roars. Check her blog out here to see some more of her amazing ideas. I keep all of my things in monthly bins now.


I have a bin for each month and a bin for some large themes (for example, multiplication or science and social studies). 
I fill each bin with everything I need that month. I fill it with books for the month, all of the papers we use that month, decorations for my classroom, and more!

My favorite part about this is that I keep the month I am currently in by my desk. Then, I add anything that I used into the bin for instant organization. Lastly, if I copy something and don't use it I throw it in the bin. Then, next year I have something to use that is already copied. BAM AMAZINGNESS! 

I bought these bins at Michaels and then added quick labels. The best part is these also make for great decoration on top of my storage containers.

I LOVE monthly tubs! I LOVE that I have genius teachers inside my school to teach me their amazing ways. I highly suggest moving from binders and files to tubs!


Teacher Timesavers {Binder Clips}

If there is one thing I think I have heard almost every teacher say it is definitely that there is just not enough time in the day.  Anything that I can find to save me time is like gold in my book. I am sharing 4 of my favorite tips with you today so you can save just a little bit of your precious time.

Do you get your class list before the school year starts and label 7,257 things with each of their names? Yup me too...and I alphabetize them so that I can easily run through my list of kids in order and always know who is missing, who didn't bring back their permission slip, and who's homework is missing.  But what happens when a kid leaves? Or a new students arrives? Do I have to relabel my student cubbies to keep them in alphabetical order? NOPE! Because I use binder clips for labeling them.  I can quickly move them around as needed and students are able to see their name even when there are papers in the cubby.   
So sometimes I try to push the limits of the amount of paper I can successfully cut at the same time JUST so I don't have to cut each page separately only to totally cut through half of the writing on pages 5 through 10.  Binder clips to the rescue again! Clip each side together before cutting, and poof! Perfect cuts on each page.  This little trick even works with a paper cutter to save your hand muscles.
 Okay one more binder clip tip while I'm on a roll here.  I used to just clip stacks of papers together at the top and throw them in my bag at the end of each day. Then I'd get home, and just looking at the mess of papers in my bag would stress me out so much, most of the time I wouldn't even take them out.  Then I started using binder clips on the side of my pages so that I could label them and see right away what I needed to do. Maybe before dinner I knew I had 5 minutes so I could grab the stack to grade quick.  After dinner I maybe had a half hour before heading to the gym so I had plenty of time to cut the pages I needed to prep.  Basically it helps me divide my tasks into smaller doable chunks that don't overwhelm me. And if I decide not to open my teaching bag at home? They are all labeled for me to try to finish up at school in the morning.
Okay one last tip. One thing I never had enough space for was anchor charts in my classroom.  So I would tape them up all over the place.  Then I would have to take them down and tape up new ones constantly. Then I realized that my anchor chart paper had 2 perfect little holes at the top just the right size for command hooks.  So I started putting up command hooks anywhere I knew I'd want to hang a chart.  Then it became super easy to hang new charts over old ones or even hang a whole pad of chart paper. I never had to struggle with ripping the anchor chart when i pulled it down to move it, and I could easy flip back to older charts to reference them with the class as needed.  And guess what? If your chart paper doesn't have holes at the top do you know what you can use to hang them? That's right binder clips, haha. Just clip 2 at the top of the page and use the silver pull back parts {does that part have a name?} to hang on your hooks.

Alright time to go buy stock in binder clips, because I have a feeling there's going to be a huge surge in Amazon binder clip orders tonight ;) Seriously though, I hope you've found something that you can use to save you time in your classroom! Be sure to come back each day for the rest of the month to find more timesavers from out EE crew!

Packin' Up! Tips from Mrs. Plemons' Kindergarten + HUGE GIVEAWAY

Are you drowning in end of the year tasks with a to do list that's ten pages long? If so our Elementary Entourage team is here to share our favorite tips to help you prepare for the end of the year.  
To be honest, I am real OCD about organization so it is super hard for me to enlist the help of my kinders in packing up the classroom.  But in order to keep them engaged AND get everything done before the last day, I have to find a way for them to help with the most time consuming tasks.  So here are my top 3 ways to get the kids involved in checking items of my end of the year to do list. 
First, and a favorite task for my kids, is cleaning all of our math manipulatives.  When I was hired for my first teaching job I dreamed of bookshelves full of books, manipulatives and materials. However, truth was my classroom had heaps of dated curriculum and little to no real teaching materials. Add on a measly little classroom budget and I was quickly brought into the reality of life as a teacher buying loads of my own materials.  This meant that I invested my own money in sets of counters and math manipulatives for my students.
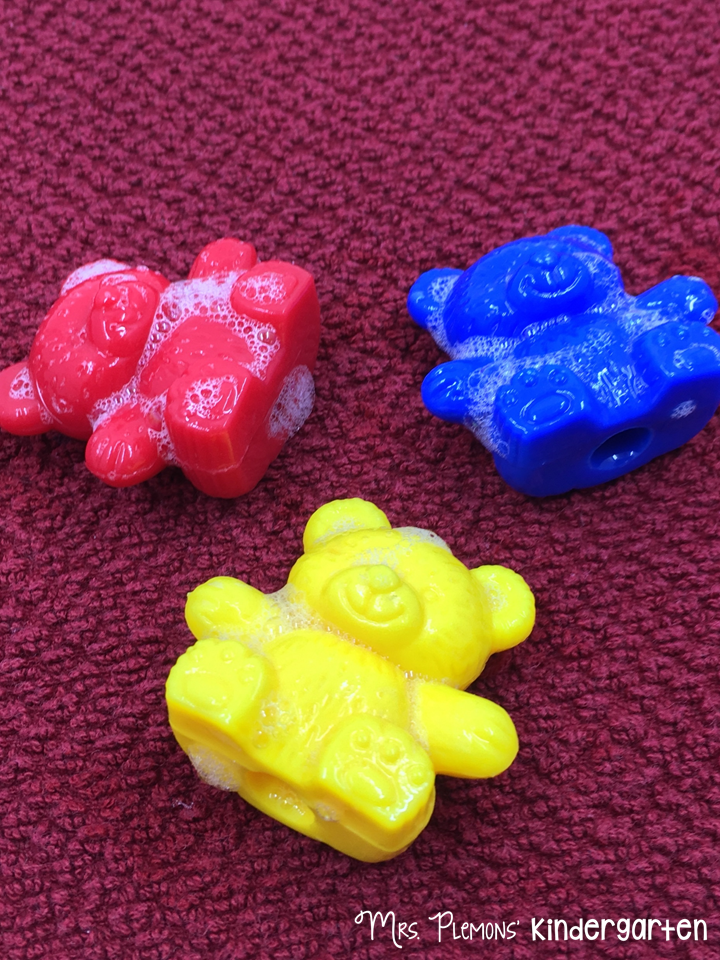
 Because I had to purchase them myself, I am super diligent about keeping them in good shape. So at the end of every year I have students sort them all back into the proper bins.  Then they give them a good scubbing!
 I fill up dishpans with soap, water, and scrub brushes for each table. Students scrub each piece and then we leave them out to dry overnight. 
 With over 20 bins of manipulatives, this would take me forever so having the kids help is the perfect solution!
 Next, is a task that most teachers have students help with at the end of the year, organizing all of the classroom books. Now not every kindergartner shares my love for organizing, so here is how I make this task less daunting. First, I gather all of my students in a circle on the rug.  Then I place a bin (or 2) of books from our library in front of each student so we can go through the organization together.

First I have students check the back of each book to be sure the number or letter matches the basket that they have.
 If there are any books that don't match they put them in the middle of the circle and I give them to the correct kiddo to add to their basket. 
As they look at each book, they also check for any books that need repairs.  If covers are torn, pages are falling out, or labels are missing they place them in our book hospital basket so I can fix them and return them to their places before the start of the year.
Next, I have students stack up their books with all of the covers facing forward and smaller books towards the front of the basket, larger towards the back.
And finally before putting the books back in the baskets, I have them wipe out the bottom of the baskets and remove any random items that may have made their home there. (I'm always amazed at the number of center pieces, pencils, mittens, socks, and who knows what else we find in there I kid you not)  

 And the final huge task I have students help with is organizing our math centers.  I have a center bin for each of the 5 main math topics I teach each year. (Number Sense, Geometry, Addition/Subtraction, Measurement, and Place Value)

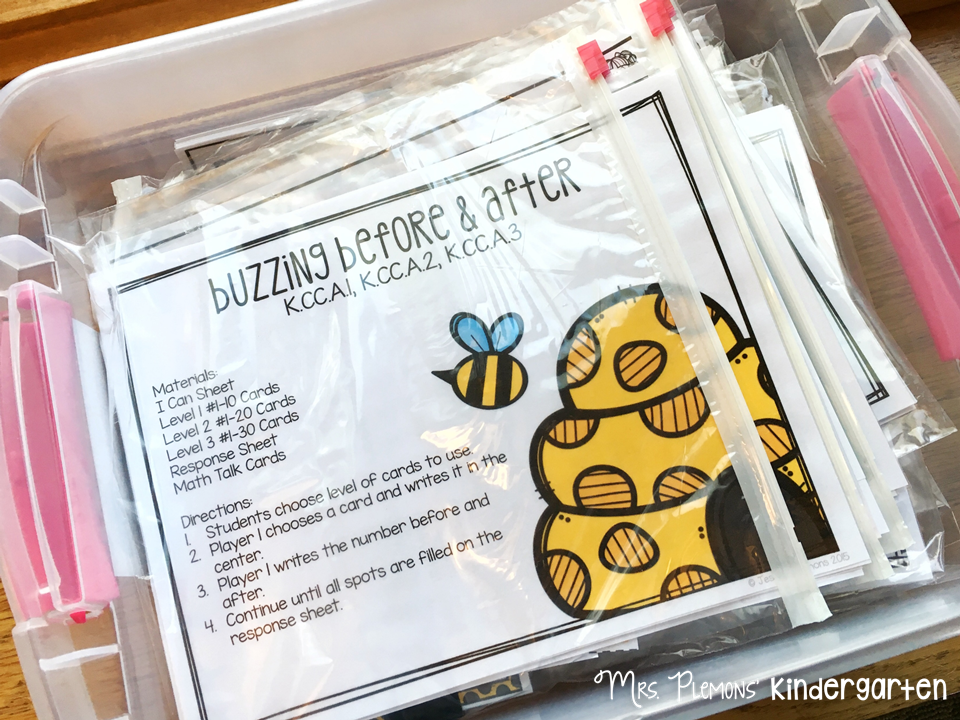
Inside each bin I have the individual centers in ziploc bags. I have students sit around the carpet in the same way we did for the classroom library. We do one bin at a time and I pass out a bag or two to each student.
  All of my centers have a page that lists the materials needed for that center.  Students look at this list and check to be sure all of the pieces are there.  If anything is missing they tell me and I make a list of missing pieces so I can either find or reprint them for the next school year.
 If a center includes laminated pages that are used with a dry erase marker, I also have students clean them really well to get rid of all the stray marks that are left when they quickly clean up each day. 
And that's it! Even though I have to let go of my OCD tendencies for a few days, having students help with these three tasks really saves me a ton of time, so its worth it to have them help!

Thanks for sticking around to read all of my tips. Now for a giveaway! Be sure to enter to win these fabulous prizes to help you pack up and get ready for next year!

Making the Most of Small Group Instruction {with Core Inspiration by Laura Santos}


About 60% of our second grade day is spent in small group instruction. Although this teaching approach is highly targeted and differentiated, it is also intense to plan and deliver. Over the past few years, I have evolved from a teacher who hated small group instruction to one who fully embraces its undeniable benefits. 

The driving force behind my growth is organization and the development of unique small group instruction management routines. The tricks below have helped make the management aspect of small group instruction more...manageable. But first, here is a peek at the two small group instruction areas in my second grade classroom:


Our reading aide meets with small groups four days a week in at the reading table. During their time with her, students are currently participating in scaffolded literature circles. Each day, they read a chapter, work on their Guided Reading Journal (filled with reading response activities that give them practice with reading concepts they have mastered), and then participate in a guided literature circle discussion and activity. These are the supplies my students use at the reading table. 


I meet with small groups in our Mini Lesson Zone. I don't mind sitting on the floor and the kids love it so we sit side by side during our reading conferences, use the table if there's anything we need to write down, and refer to our mini lesson notes/posters on our easel. Anyone who's waiting for their turn to meet one on one with me reads at one of the placemats so they can quickly join me when it's time. 


My small group instruction is more like individualized instruction, therefore students are required to bring their own book bins and journals. 


Whiteboard markers, highlighters, and pencils are provided so students don't waste transition time gathering these supplies. 


Okay, now that you have an idea of where small group instruction takes place in my second grade classroom, here are the details on how I keep our small group instruction time running smoothly. I’ve set these details up as solutions to common small group instruction problems or roadblocks.

Problem: My students do not transition quickly during small group instruction.

Solution: PowerPoint Transition Slide Deck

Use PowerPoint to create visual reminders for students. Saving these reminder slides on your computer and displaying them specificlly during the instructional time they are needed reduces the need for posters and clip charts that are only used for a short time during your school day.


I use this slide deck during Daily 5 and have a similar deck for Math Workshop. It is my absolute favorite classroom management tool. The deck is filled with slides that are connected by a series of timed transitions and sounds effects that signal when it is time for a brain break or for a new round of Daily 5 to begin. At the start of Daily 5, I simply click play and the slide deck keeps track of time, makes peaceful noises that signal when it’s time to transition (so much better than having to say it...the less we talk...the better), gives a visual countdown, and shows who should be working in the small group areas.  I’m not going to lie, creating this originally took me more time than I’d like to admit...but now that the templates are created, it takes less than five minutes to change small groups based on assessment results.

Problem: I work on different activities during small group instruction time each day and my students forget what they are supposed to bring to the small group area.

Solution: Visual Reminder Posters


Post a sign that informs students which activity they will work on each day, the supplies they need for that activity, and what they should do while they are waiting for their instruction to begin. Once again...save your voice for the important stuff...the less you have to use it for silly verbal reminders, the less likely you are to sound like the teacher from the Peanuts cartoon.
I hang these signs on the whiteboard behind me near our mini lesson zone because each time my students meet with me, they need different supplies.
  • Their own Word Pocket (for Words Their Way instruction on Monday)
  • Their personalized book collection (for reading conferences on Tuesday, Wednesday) 
  • Their personal Word Collector’s Notebook (for collecting words in context and their weekly mini assessment on Thursday, Friday). 
In honor of this blog post, I created a sign for the reading table where my aide hosts her small group instruction. This sign is simply a reminder that students should work in their Guided Reading Journal while they wait for other students to finish their reading in preparation for their group reading response activity. She uses guided reading books and literature circle books so students don’t need to bring anything with them when they visit her.

Problem: My system of using bins to store supplies for reading groups isn’t working.

Solution: Get smart with your classroom furniture. 


Find furniture that reduces classroom clutter and keeps you organized. This 5 Bin Storage Tower from The Container Store is an easy way to keep supplies together for your reading groups without having to deal with overflowing bins that create visual noise in your classroom. Each day, you can gather the supplies for the small groups you will be instructing and tuck everything out of sight once small group time is over.

In my classroom, this tower is used solely by my reading aide. To keep our storage tower optimally organized, I added a group label to each bin and have each group’s literature circle books and Guided Reading Journals inside. I keep student work out of folders because it removes an extra step when I need to quickly assess student work. If work is tucked inside a folder, I tend to forget about it…#teachertruth.

I would love to hear from you about any additional roadblocks you may be facing during your small group instruction time. Please also share your unique solutions to the roadblocks mentioned above. Can’t wait to hear from you!


Assessment Tips & Tricks! [From Sassy, Savvy, Simple Teaching]


Hello Friends~

It's Dianna here with you today from Sassy, Savvy, Simple Teaching! Today I am coming from the mindset of a K-3 North Carolina teacher. So this post would be similar to anyone from another state or county that assesses beginning, middle & end of the year in Reading using Dibels, TRC, DRA, SRA, Fountas & Pinnell, a combination of assessments, or any other similar assessment kits.

If you are like our state, we have a 15 day window to complete assessments. At my school, during the beginning & middle of the year assessment windows teachers completed assessments on their own. At the end of the year, with switching assessors, my principal gives teachers a 1/2 day to accomplish most of the assessing, then the teachers are on their own to finish up. [Very nice of him, only a few schools do it! I do beg all year for my teachers to get that! LOL!] He does this because it can get tricky assessing students in a neighboring classroom with schedules. Also, there is a HUGE fidelity check in place seeing that this counts towards teacher evaluations. But the bottom line is, it comes down to $ for subs. So I ask at the beginning of the school year so that we can have $ to do this. On average a teacher can assess 5-8 students in a class for TRC. So it is greatly appreciated by the teachers! 

During all of the assessment windows my Instructional Coach & I offer to come in for a 30-60 minute window to teach a lesson or do an activity for teachers to assess during. I also offer to help classes with high numbers & our newer teachers. I make sure to always offer any type of assistance, but most of my teachers prefer to get it done alone [Then come to me the last few days asking for help if needed & freaking out! LOL!] I do keep daily checks on our completion rate to avoid last minute finishers. I like to keep everyone up to date & in the loop so we don't procrastinate. With that being said, it is very important for teachers to read 1:1 with their own students when assessing. It's the most important instructional data you can get, better than anything from paper. So I try to help teachers in other ways than doing their assessments for them. 

I'm here with you today to discuss how to organize & complete the K-3 mCLASS assessments [Dibels & TRC] without shutting down instruction. 

*BEFORE YOU CONTINUE TO READ.... This is nothing new, this is nothing teachers do not already know or should know, this is what is not always happening to be successful...


1: Prepare Materials
 Monkey Business/DollarPhotoClub
Teachers, you need everything ready! No wasting time, not even a minute. Prepare everything!

Before assessments begin...
  • Mark the Dibels assessments in student book with labeled tabs; example: NWF EOY, LNF EOY, & DORF EOY. 
  • Make the Word Recognition lists in student book with labeled tabs; example: List A, List B & List C. 
  • Pull the correct genre of books for each level needed to begin assessments.
  • Charge your tablet. 
  • Log into your tablet & make sure updates are done.
  • Keep your charger near by.
  • Have an extra tablet ready in case it is needed [like your personal iPad]. 
  • Sharpen all pencils & have good erasers ready.
  • Have privacy folders ready.
  • Talk to nearby teachers, sometimes you may need to borrow a book if you have 2 students assessing on the same book. Know where their materials are in advance so you can quickly borrow it.
All of my teachers have a master binder of all the written comprehension questions & rubrics. They are to have that out & ready to use. I also suggest flagging them by levels for easy access. 

I suggest to my teachers...
  • Copy TRC written comprehension question pages needed & have loose leaf paper ready. This way after the running record & oral comprehension questions students can begin their written response if needed. 

2: Organize Assessment Space
 monkeybusinessimages / BIGSTOCKIMAGES
Please do not be a distraction to yourself or your students. Nothing is more uncomfortable to sit & assess at a table stacked with books, papers & miscellaneous items. First of all, if you consistently meet with students at this space, it should never be a "hot mess". Nobody can focus in this type of setting. Your eyes & the students eyes will draw near the mess. Where ever you plan to assess, it should be cleaned, organized & only the materials needed visible. A small group meeting table should not be used as a shelving unit. It should be cleared for you to work with individual students or small groups of students. If you are a teacher that collects clutter, please be aware of that & for assessments do your best to keep this area uncluttered for the assessment window. Clean, uncluttered & visually soothing assessment areas only help your student focus & you to focus.

This is all you need at your assessing table:
  • Teacher assessment materials.
  • Student assessment materials.
  • Tablet to mark assessments.
  • Tablet charger & an extra device for back up.
  • Copies of students written response papers needed or loose leaf paper.
  • Sharpened pencils.
  • The "good" erasers.
  • Privacy folders.
  • Tissue & sanitizer.
  • A special treat for a job well done!
  • Don't forget to clean the space too!

3: Prepare Students
Woodapple / DollarPhotoClub
Preparing students means a variety of things...

Tell your students...
  • You will be assessing & reading with them individually. 
  • You believe in all of them & can't wait to see how they have grown as readers.
  • You want to listen to all of them read with you alone.
  • You will be giving each one of them individual time with you.
Remind your students...
  • When assessing, we do not bother the student or teacher unless it is an emergency.
  • What an emergency is.
  • Protocol for going to the bathroom, sharpening pencils, tattling, asking group leaders for assistance & so forth.
As a teacher you should always have materials prepped... But we know how that goes, so make sure you have your materials prepped for the 15 day assessment window. Do not waste time that should be spent with students looking for things.

Prep everything that your students need all 15 days in advance...
  • Mini-lesson materials
  • Whole group materials
  • Small group materials
  • Center materials
  • Everything on your boards
  • Copies & papers needed
  • Charts
  • Technology.

4: Prepare Calendar
vinzstudio / DollarPhotoClub
I can't stress this enough, there is something about actually writing out a schedule just like a to-do list that creates a sense of follow through. Consider assessment time as an appointment with each student. This is a special time where you give each student a handful of your attention to hear & see them read, remember this is THE BEST DATA YOU WILL EVER GET! It is better than reading scores on paper afterwards. 

When making your schedule here are things you SHOULD NOT DO:
  • STOP mini-lessons
  • STOP ALL of your small group meetings
  • STOP ALL of your individual conferences 
  • SIT yourself in a chair all day
  • RAISE YOUR VOICE at students from a chair all day

When making your schedule here are things you SHOULD DO:

For TRC:
  • Make note of students you expect to jump many book levels. They will take longer.
  • Make note of students who write slow & write fast. When responding to reading through writing, students vary on time needed.
  • Make note of students you expect to move 1-2 book levels up. 
  • Make note of students who get distracted easily.
  • Make note of students who can read & respond during any setting.

Now start scheduling students! For TRC, you are expected to complete 2 students a day. If you follow this, you will not fall behind.

Here are my suggestions for mCLASS Dibels & TRC:

For TRC:
  • Use your morning work / breakfast time to complete a student. Primary teachers always say students read better in the morning! Plus you are not using your "teaching time" at this point in the day. Also you do not have a classroom full at this time as students are arriving. If you have rituals & routines, this is a good time to use.
  • Use "bonus resource" time. At my school, teachers have Guidance or Media Center as a "bonus resource" outside of their daily resource time [PE, Art, Music, Lab]. Of course you never want to use your planning time but this is extra. Teachers still get their daily planning time. This is the time to assess a student who is distracted easily. You can do this in an area where nobody is around that would cause distractions. 
  • Use 1 of your small group meeting times. DO NOT STOP SMALL GROUPS! Most teachers have 2-3 small groups a day for 12-20 minutes. Adjust your schedule for the 15 day window that allows students to be in centers while you assess a child individually. You are still continuing your daily small group instruction during your other rounds.
  • Use 1 of your whole group work periods. Sometimes after a mini-lesson students all have an activity to complete prior to centers. Pull a student to the back table to read to you. 
For Dibels:

These are 1 minute... My first suggestion may shock people, but I did it & so can you...
  • DURING GUIDED READING SMALL GROUP! When students come to your table they usually have a warm up activity, book walk or something similar. Ask a specific student to sit on the end or corner by you. When the other students get started, have them assess. This is a perfect time to get NWF, PSF, FSF, LNF or DORF completed. 
  • When students are lining up. Let's be serious, most teachers can take up to 5 minutes to line students up. Take a student aside for 1 minute.
  • During bathroom breaks. Again 1 minute to assess while students are standing silently waiting their turn. 
  • Use 1 of your small group meeting times. DO NOT STOP SMALL GROUPS! Most teachers have 2-3 small groups a day for 12-20 minutes. Adjust your schedule for the 15 day window that allows students to be in centers while you assess a child individually. You are still continuing your daily small group instruction during your other rounds.
  • Use 1 of your whole group work periods. Sometimes after a mini-lesson students all have an activity to complete prior to centers. Pull a student to the back table to read to you. 

5: Use a Timer
alessandrozocc / Dollar Photo Club
Do I sound crazy for saying this?!?! I'm not!!! Most teachers are like, "around this time I do this" or "around this time I start this" or "I'll start this around this time"... NOPE! They never stick to a minute by minute schedule. That's a big problem with teachers on a regular day, they have wasted time & don't even realize it. Not going to work during assessments people! You have to be on a strict schedule. Set a timer for everything! Teachers normally only set the timer for centers. Set the timer for things you don't usually do, like:
  • morning work
  • mini-lessons
  • transitions
  • bathroom
  • clean up
  • whole group work period
  • lining up
  • bathroom
  • recess
  • lunch
EVERYTHING! This will help you when planning your assessment appointment calendar. You will know the exact amount of time you have allotted yourself. Also this will cut down on behavior problems. Keeping students on a "strict diet of time" is like "keeping your ducks in a row" & I'm being serious. The less unstructured time, the better for you & your students!


6: Execute! NO EXCUSES!
Iliana Mihaleva / DollarPhotoClub
If you stick to your plan, do not get sidetracked, don't waste time, you can get it done! 

BIGGEST MISTAKES: 
  1. Not starting assessments on day 1.
  2. Not having student rituals & routines.
  3. Not having student expectations.
  4. Not being organized daily.
  5. Not having testing materials prepped.
  6. Not using every minute of every day accordingly.
  7. Not using an appointment calendar for assessments.
  8. Not having clutter in your assessing area.
  9. Not having students materials for lessons prepped .
  10. Note having teacher materials for lessons prepped.
You can do this! Prepare to stay focused! Every minute counts when you are trying to assess during the regular school day!